
Click here to return to the Table of Contents
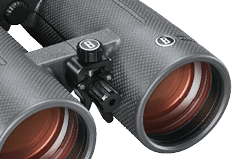

Fig. 7 Forward Lug position
Fig. 8 Rearward Lug position

Reticle Leveling

Main Focus Knob

Reticle
Focus
Diopter

Figure 6

Fig. 9
Threaded socket cap cover

5
Fig. 10
Forward thumb screw
Fig. 11
Upper thumb screw

BridgeSet IPD
Stabilizer collapsed

BridgeSet IPD Stabilizer expanded
4. Main and Reticle Focus diopter
While looking at a light-colored blank wall or similar plain background, use the Main Focus Knob (Fig. 6) to make the background out-of-focus. Concentrate on the right-barrel reticle and rotate the Reticle Focus Diopter (Fig. 6) in either direction until it is sharp. The binocular is now calibrated to your vision, and the Main Focus Knob is typically all you’ll need to adjust moving forward.
5. Rotating/leveling Reticle
Focus on a target image and level the reticle with the horizon using the Reticle Leveling control (Fig. 6). This control is relatively stiff to turn to reduce accidental adjustments.
Tripod & bridgeset IPD Stabilizer Mounting
The Match Pro ED offers two ways to attach a tripod mount or the included BridgeSet IPD Stabilizer. This allows two accessories to be used at the same time.
To attach the binocular to a tripod, unscrew or pull off the cap which covers the threaded socket (lug) and set it aside in a safe place. Use a compatible binocular tripod adapter accessory to attach the binocular to any standard tripod horizontally to provide stability during prolonged viewing.
The BridgeSet IPD Stabilizer allows you to secure your customized IPD or eye-to-eye width. The accessory can be put in the forward (Fig. 7) or rearward (Fig. 8) lug positions.
To attach the accessory: